Masonry & Concrete
How to Build a CMU Block Wall: Step-by-Step Guide
A straight, durable CMU wall is won before the first block is set. The footing must suit the soil and load, the layout must be square, and the first course must be level. Once those fundamentals are in place, line blocks, consistent mortar joints, and regular plumb checks make the remaining courses far more predictable. This guide explains the field sequence for a properly designed wall—not a substitute for engineering or local permit requirements.
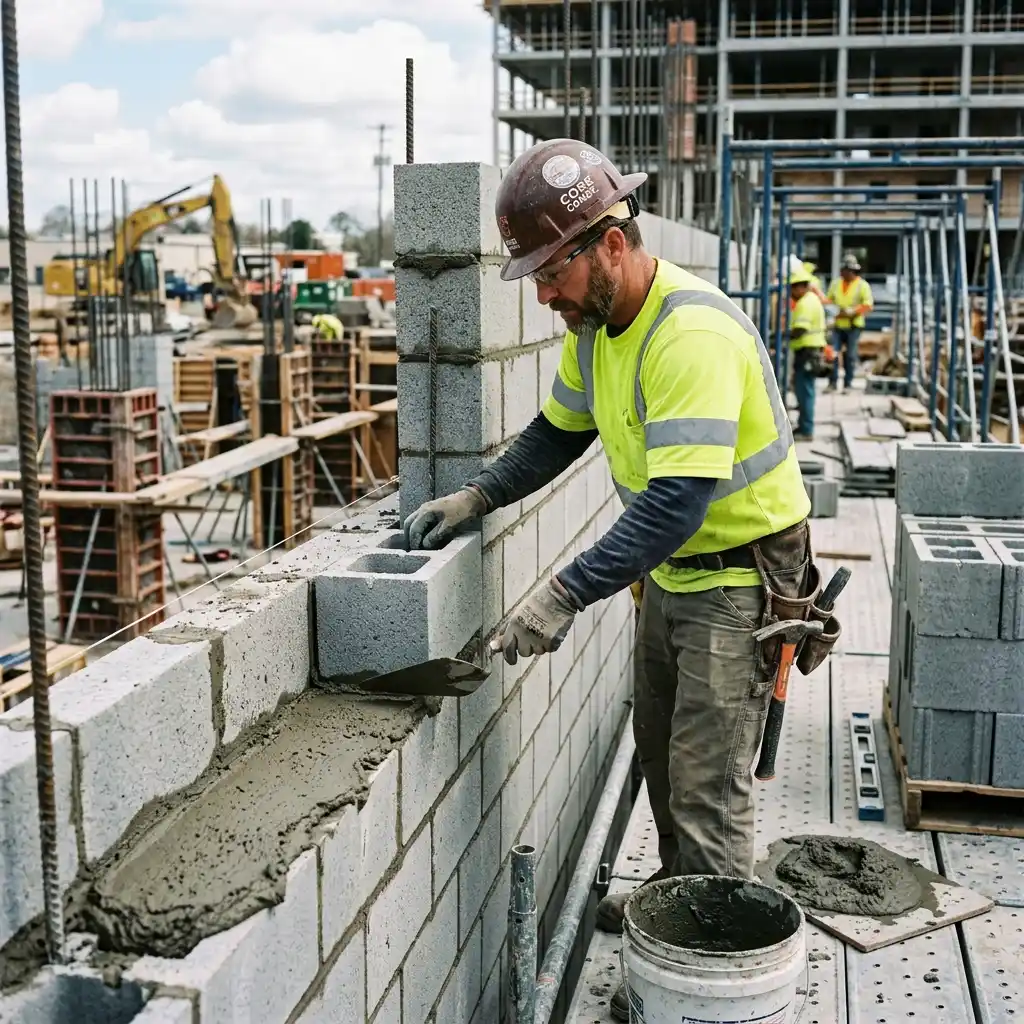
Building a straight and plumb block wall takes patience and careful layout.
1. Define the wall’s job before you plan the materials
Start by naming the load the wall will carry. A freestanding garden screen is different from a wall holding back soil; a basement stem wall is different again. The answer determines the footing, wall thickness, reinforcing, grout pattern, drainage, and whether an engineer must specify the work. A decorative wall can still fail if it is poorly founded, while a retaining wall can become hazardous if it is treated as landscaping rather than a structure.
Make a simple site plan showing length, height changes, corners, gates, utilities, finished grade, and drainage direction. Measure the slope on both sides of the proposed wall. For work near a driveway, building, utility easement, or neighbor’s property, the constraints are often more important than the block count. If the wall retains any substantial grade, read the CMU retaining wall guide before finalizing a layout; it covers drainage and backfill issues that a freestanding wall does not face.
2. Estimate units, mortar, reinforcement, and waste
Use the nominal face dimensions of the selected block. A nominal 8 by 8 by 16 inch unit covers about 0.89 square foot, so a wall needs about 1.125 units per square foot before waste. Deduct the rough-opening area of doors and windows, then add a realistic waste factor for cuts, breakage, corners, and changes in bond. Do not forget cap units, half units, bond-beam units, lintels, rebar, tie wire, grout, drainage stone, and any waterproofing materials.
The CMU Block Calculator handles the quantity side quickly. Enter the wall dimensions, openings, block size, rebar spacing, waste factor, and whether cores will be filled. It also provides an editable material-cost estimate. Treat the result as a takeoff, then compare it with the approved drawings and supplier availability. Standard units vary by market, and special shapes may require lead time.
3. Gather tools and prepare the work area
A basic masonry setup includes a brick or margin trowel, jointer, line blocks and mason’s line, 4-foot level, tape measure, speed square, chalk line, mixing tub or mixer, wheelbarrow, mortar hoe, masonry saw or splitter, safety glasses, gloves, and hearing protection. For reinforced work, add a rebar cutter, tie wire, and a way to place and consolidate grout as specified. Keep clean water and shade available in hot weather; mortar that dries too quickly or is retempered improperly will not perform as intended.
Stage block on a stable surface close enough to reduce carrying but far enough from the excavation edge to avoid surcharge loads. Protect units and bags from mud and standing water. Mark a no-go area around open trenches, and do not work beneath unsupported excavation walls. A tidy staging area makes it easier to preserve the first course’s layout marks and keeps incompatible materials from being mixed into the mortar or grout.
4. Excavate and build the footing to the approved design
Excavate to the required width, depth, and frost protection. Remove loose or organic material, and do not assume a narrow trench is adequate because the wall is short. The footing distributes wall loads to the soil; its size and reinforcement must match the design and local conditions. Set forms where needed, establish top-of-footing elevation with a laser or level, place reinforcing steel on approved supports, and arrange vertical dowels before the concrete is poured if the plan calls for them.
Place, consolidate, and finish footing concrete without disturbing the dowels. Verify the dowel spacing and embedment against the plans while it is still accessible. Allow the footing to gain the required strength before loading it. If you are building a small landscape wall under a prescriptive local detail, follow that detail exactly; do not silently substitute thinner concrete, smaller bars, or shallower depth.
5. Dry-layout the first course
Snap the wall line on the footing and dry-place units to check the bond. Start with corners and work toward the middle, accounting for the nominal 3/8-inch mortar joints. This exposes awkward end cuts before mortar is mixed. Establish the top of the first course, not just the top of the footing: footings are frequently slightly uneven, and the mortar bed is what levels the masonry.
Set corner leads first. Butter the bed and head joints, press the unit into mortar, and tap it to line and level. Check each lead in both directions. A common mistake is trying to correct an out-of-level first course by varying later joints; that produces a visibly wandering wall. Take the time to lift and reset a unit while the mortar is fresh rather than forcing the next course to compensate.
6. Lay courses with consistent bond, line, level, and plumb
Run a mason’s line between corner leads for each course. Spread a workable bed of mortar, butter the head joint, set the unit with a controlled downward-and-forward motion, and trim excess mortar. Keep bed and head joints consistent—typically around 3/8 inch unless the specification says otherwise. Stagger vertical joints in running bond and use the correct half or corner units rather than creating weak, random slivers at returns.
Check the wall frequently: line along the face, level across and along each course, plumb at corners and several intermediate points, and measure diagonals at rectangular layouts. Correct small errors immediately. Avoid excessively thick joints as a shortcut, and do not use a block as a hammer. In warm or windy conditions, protect fresh work from rapid drying; in freezing conditions, follow cold-weather masonry practices and do not lay on frozen surfaces.
7. Install reinforcement and grout only as detailed
Place vertical bars in the designated cells and horizontal reinforcement or bond beams at the specified elevations. Keep steel clean and properly positioned; bars pushed against the cell face do not have the intended cover. Where cells are to be grouted, remove mortar fins and debris so grout can flow. Use compatible grout—not leftover mortar—and place it in lifts appropriate to the wall and specification. Consolidate it as required, taking care not to displace the masonry.
Not every CMU wall needs every cell filled. Fully grouted construction may be specified for strength, while partially grouted work puts material only in reinforced cells. The calculator’s core-fill option estimates volume, but the drawings control which cells are filled. For the structural reasoning behind those choices, compare this system with cast walls in our CMU vs. poured concrete wall comparison.
8. Finish joints, cure, and protect the work
Tool exposed mortar joints when they have begun to firm up but are not hard. Proper tooling compacts the joint face and improves weather resistance. Brush off crumbs rather than smearing them across the units. Cure and protect fresh work from heavy rain, direct sun, and freezing weather as conditions require. Do not lean ladders, stack heavy materials, or attach loads to green masonry.
If the wall is below grade or retains soil, install the specified waterproofing or drainage layer before backfill. Backfill in controlled lifts, protect drain tile from fines, and do not operate heavy equipment close to an uncured wall. Water pressure and aggressive compaction can damage a new wall long before its visible finish has a chance to prove itself.
Common mistakes to avoid
- Starting without an approved footing, drainage, or reinforcement plan.
- Using actual block dimensions rather than nominal module dimensions for layout.
- Rushing the first course or failing to verify line, level, and plumb repeatedly.
- Adding water to mortar after it has begun to set, or using mortar in place of grout.
- Backfilling a retaining or below-grade wall before it is ready and waterproofed.
- Assuming a wall is nonstructural because it looks short or is made of hollow block.
When to bring in a mason or engineer
Hire qualified help when the wall retains earth, carries a building load, includes a large opening, exceeds a local height threshold, has unstable soil, or needs a permit. A consultation early in the project is often less expensive than demolition after an inspection failure. It also clarifies the scope a contractor should price, making quotes more comparable.